This is a guest post from one of the web’s premier Mac users. Matt Longmire is out of the Seattle area and offers Mac software training remotely and in person. You should really check out his Macblend video blog. He offers some great and useful tips for everyone.
If you’re like most people who give presentations frequently or send dated documents every other day, you’d probably be surprised to find out that there’s a much easier way to “timestamp” those documents and slides. Honestly, how much time do you spend simply adding a new date to the same document or presentation over and over again?
The good news is that there’s a really fast and simple trick to make that process completely automatic if you’re using iWork. First let’s talk about Numbers. It’s just spreadsheet software right? Not quite. It’s actually capable of performing some powerful (even automatic) formulas within your tables. These formulas can also be brought over and used in Pages & Keynote. So how do we achieve this awesome automatic “timestamping?”
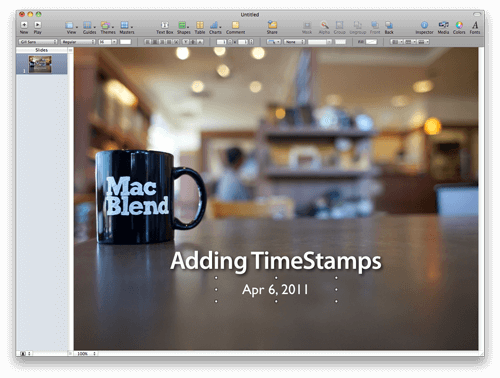
Step 1: Create or open your Pages Document or Keynote Presentation.
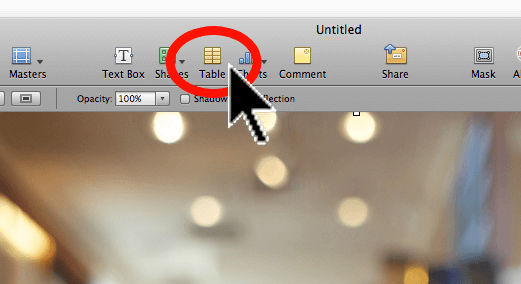
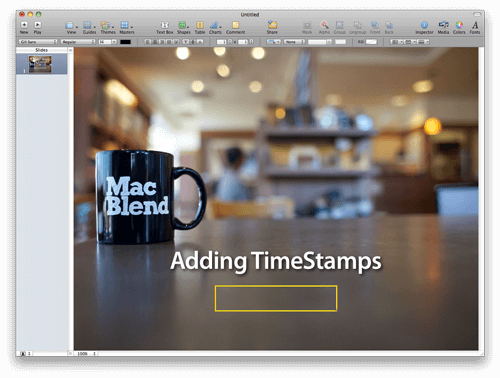
Step 2: In the toolbar, click the “Table” button to add a table to your project. Then move it to the location you want the Date and/or Time to be.
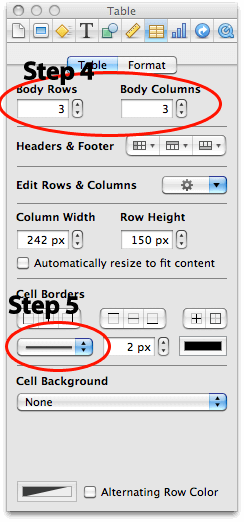
Step 3: Open the Inspector and click on the tiny table icon at the top. (Note: It usually automatically does this for you when you add a table.)
Step 4: Change the amount of columns and rows to 1 x 1. (This is optional, you can have as many as you’d like but in the spirit of being inconspicuous we just need one) After changing the amount of rows and columns, you can use the white boxes surrounding your new table to resize it to the size you’d like.
Step 5: Set the “Cell Borders” to “none” so that your Time Stamp simply looks like text and not text-within-a-box.Step 6: Double-click the inside of the box to begin typing but instead of typing normal text, press the = button. This will allow you to enter a formula. I know, I know. Formulas sound like a lot of work if you don’t normally work with spreadsheets but these are easy ones. 🙂
6A: To have it add just the date type: =TODAY()
6B: To have it add the date and the current time, type: =NOW()
Step 7: Click the green check mark symbol to set your new formula in place and: Voila! Now your date and/or time is taken care of for you!
Either option will update each time the document is opened. You can of course tweak the design in anyway that you like. What’s most important about this feature is that you’re not limited to just these formulas.
Try using other formulas in your Pages & Keynote tables and you’ll be quite surprised at what you can come up with. Things like, auto-updating presentation data, automatic invoicing calculation, and who knows what else!I hope you’ve enjoyed this mini-tutorial and feel free to reach out if you have any other questions!
Matt Longmire
MacBlend
MacBlend is a Seattle based training & consulting company specializing in Apple computers. Visit www.MacBlend.com for more information about our private training and group workshops.
This article © MacBlend 2011
Awesome post Matt! Thanks for hanging out with us today. Make sure you check out Matt’s site MacBlend


